Are you sick of seeing that in all manner of tutorials? I am, so I'm not going to bore you with making a mindless script that does nothing but show "Hello World" on the screen. Instead we are going to make a script actually do something. So lets continue on to The Concept. Note: For this tutorial, I will be using NWN2. The concept is the same, and the script will most likely be identical. However if you use NWN1 you will need to make compromises on the area constructions. These tutorials are designed not only to help you learn scripting, but hopefully teach you a bit about the toolset as well.
The Concept:
- We will need an area with a chest in it.
- We will need an area that represents the inside of the chest to send our PC to.
- A good way to detect if a PC comes near an object is to use a trigger, so we will need a trigger around the chest.
- To transition a Player, we need a location or a object to Jump them to. For this case we will use an object. So we will need a Waypoint object.
As with any script, we need a concept. A concept is nothing more than an idea of what we want to do. Once we have that we can start to lay it out in a script. This is what we are going to do;
Lets make a chest, that when any player comes close to it, that player gets teleported into the chest.
Lets break this down into what we are going to need,
Start the toolset and select "Save As" from the file menu. Save the mod as "tutorial_1". Keep this mod as we will continue to work on it as we progress threw these tutorials.
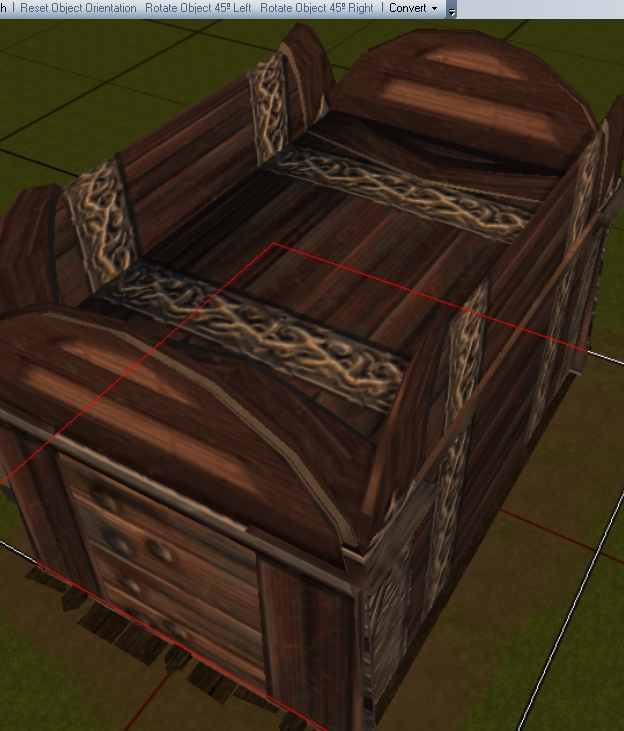
Now select "File > New > Area" and create a new exterior area and make the size "tiny" (4x4). We won't need a lot of space. Next go to "Blueprints > Placables > Manmade Props > Containers" and select the "Chest {01 Large}" placable. Place it down in the upper left corner. I turned mine about a 45 degree angle towards center.
Select the Start location arrow and move it to the lower right section and rotate it towards the chest. Tip: Rotate an object by holding down the Crtl key and pressing the left or right arrow key.
Next got to "Blueprints > Triggers > Empty" and select the "New Generic" trigger. Paint the trigger down by clicking on the map - this starts a corner, then click around the chest to create a half circle in front of the chest. I only want to grab PCs that the chest can "see" or is in front of the chest.
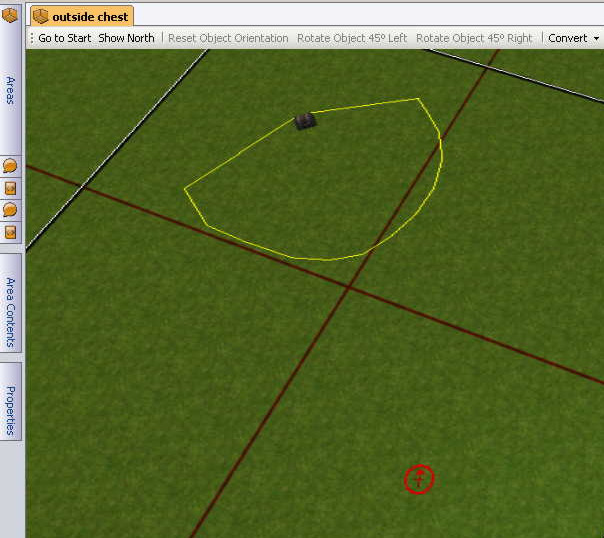
Your 1st area should look something like this,
Now we need to make an area that represents the inside of the chest. We want to give the impression that the player has shrunk really small to fit inside the chest - so we need a BIG chest.
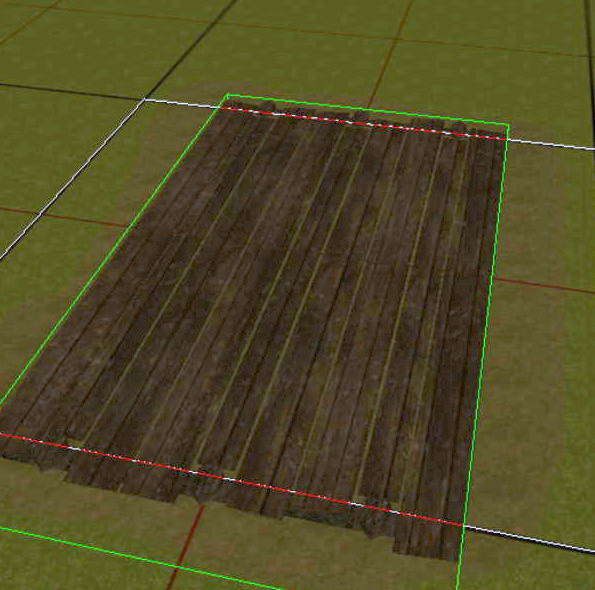
Start by making a second 4x4 exterior area just like the first and name the new area "inside chest". Now go to "Blueprints > Placables > Building props " and select the "Dock {Square Piece}" and place it down in the center of the map. Press "ESC" to select it.
With the dock selected, go to "Properties > Scale" and enter 3,5,1. This will make the dock very big. Now press the "Page Down" key and sink the dock into the ground so it is almost level with the service of the ground. Some of the grass will show threw the cracks but that's OK, our Players are supposed to think they are really small. If you want, texture the ground underneath the dock so it looks like dirt by going to "Terrain > Texturing" and select a dirt texture to paint down.
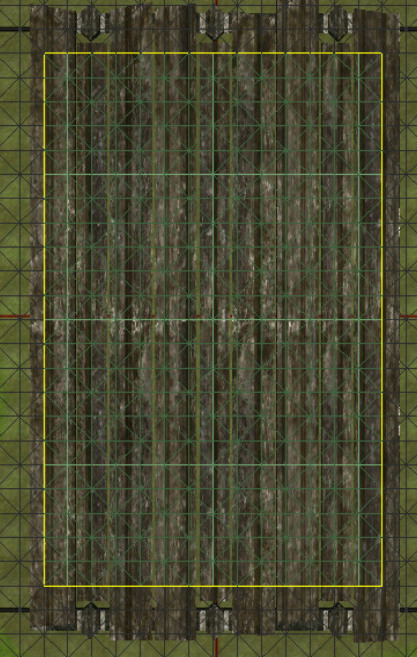
Now we don't want out Players walking out of the chest, so go to "Terrain > Terrain" and select "Non Walk". Make the area around the dock, and slightly onto the dock non-walkable. This will keep our player contained. Tip - Best if done while looking straight down at the map, and make sure "Surface mesh" is turned on by clicking the button near the upper left of the tool bars.
We need a Waypoint for the Player to jump to. Go to "Blueprints > Waypoints > Empty" and select "waypoint". Place one near the center of the dock and select it. In the Properties window, change it's tag to "WP_INSIDE_CHEST".
Now select the same chest you used in the first area and Place it down in the center of the dock. Select it and open it's properties. Change the scale of the chest to 1,30,30. This will be the Left side of the chest. Select it and move it to the left edge of the dock. When you have it in place, press "Ctrl+C" to copy the object and then press "Ctrl+V" to paste, a new instance of the object will now be attached to your cursor. Place this new object on the right edge of the dock. We now should have a floor, and 2 sides. Again place the same chest down in the center of the map as we did previously. Scale this one to 34,1,30. This will be our other 2 sides of the chest. Move it to the top edge of the dock and copy-paste a second one and move it to the bottom edge of the dock. We should now have a box.
We don't have a curved texture to use for the lid, but the same chest will still work. Place another chest down in the center and scale it to 34,34,1. Press the "Page Up" key to raise the second dock to serve as a top. Now you should have a closed in box. From the outside it don't really look like a chest, but once you zoom your camera into the box, it looks like you are very small :) Special Task: Find some placables that would fit into a normal chest and scale them up, like Dice to give even more of a feeling of being shrunk.
Select the 4 sides, the bottom and the top and convert them to environment objects. Do this by selecting one and right clicking > Convert > Placable to Environment object. Hint: Hold down the Shift Key while clicking on object to multiple select. Now Bake all areas.
On to the part you have been waiting for - THE SCRIPT!!!
Remember our concept? When any player comes close to the chest, that player gets teleported into the chest.
Because we are going to use a trigger to determine when the Player is close enough, we will want to place our script in the "OnEnter" event of the trigger. Start by going to "File > New " and select "Script".
Every script must start with void main, so on the first line, enter void main(). The Parenthesis are for passing parameters to the script. In NWN1, you can't pass parameters to a void main, but in NWN2 you can - but that's another topic, for now we will stay with the open/closed parenthesis. Now we must Open the main scope. On the next line enter in a { to open the main scope and so we don't forget to close the scope, skip a line and enter a } to close the main scope. Notice that when we enter the closing } both the open and close curly brackets turn bold. This is to assist in trouble shooting when we miss a open or close parenthesis or curly bracket - if it don't go bold, one is missing.
Click on the blank line and hit tab, I like to keep my script indented and I indent again every time I open a new scope. We will see that later as we progress but for now we will just be working inside the main scope.
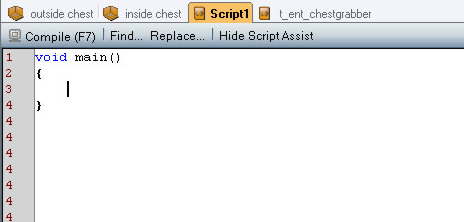
You should have something similar to this;
I like to declare all variables at the top of the script. In fact there are some scripting languages out there that require all variables to be declared before any functions can be used. For your first line, lets enter a comment informing us and anyone else that we are declaring variables.
void main()
{
// Delcare Variables
}
How to find functions:
Before we write the script, I want to talk a bit about finding the functions we need. For this script we will need a function that will get the player that enters the trigger. For this we can use the script assist filter. Make sure the "Show System Functions" box is checked and click in the Filter box. Think about some key words (as with any search engine) that might produce the results we are looking for. How about the word "Enter"?? Sounds logical so type the word "enter" in the filter box.
The function list should narrow down to only 3 choices. Click on each one and read the notes at the bottom of the script editor to help choose the best suited function. If you picked "GetEnteringObject" then you are correct.
This is a good way to filter out functions and help us find the ones we need. If we were looking for a function that might help us with Player names for example, typing "Name" in the filter box would point us in the right direction. Now, double click on the "GetEnteringObject" to auto place it in the script editor and lets continue.
You should now have a GetEnteringObject in the script editor. Each function requires a open "(" and a Close ")". If you double click on the function, the Notes will pop up and inform you of any parameters that may or may not be required for this function. This function doesn't require any parameters, the last entering object will automatically be used so we simply add the "()" to the end of the function. Also, this is the end of the first line - remember what is needed at the end of each line? The semi-colon ";"
Your script should now look like this;
void main()
{
// Declare Variables
GetEnteringObject();
}
Humm, something just don't look right - don't you think? Look close, where is the object "gotten" by the function GetEnteringObject going to go? If the word "Variable" popped into mind, pat yourself on the back.
We need to define a varaible for the object returned by this function to be placed. Remember we need to declare the variable and tell the editor what type of variable it is, and give the variable a name. Looking at the function notes, it returns an object data type. We need to declare an "object" type variable, and we will name it oEnter. So edit that line so it looks like this,
void main()
{
// Declare Variables
object oEnter = GetEnteringObject();
}
Now we can use the variable oEnter as the entering object. Because we are going to jump the player to a new area, we need a location - or a object to jump to. We already placed a Waypoint in our "inside_chest" area with the tag "WP_INSIDE_CHEST". This is the object we will use to jump to so we need to "get" that object as well. Use the script assist filter again and enter the word "Tag". You will see a few functions listed but the one we need is "GetObjectByTag". Double click on it to auto-enter it into your script. This will need to be defined as a variable as well, look at the function notes to see what type of variable it needs to be. We can also see that it requires a parameter, in this case a string that matches the tag of the object we need. Note: a string type variable could be used here as well - more on that later. Declare the variable and name it "oWP" then enter the TAG of the waypoint we want to "get" between the "( )". Note: strings require quotes.
void main()
{
// Declare Variables
object oEnter = GetEnteringObject();
object oWP = GetObjectByTag("WP_INSIDE_CHEST");
}
Now we have our entering object, we have our Waypoint we want to jump to, so now we need a function that is going to jump oEnter to oWP. Before we continue, we need to talk a bit about "Script Focus" or "Calling".
The script caller: The caller of a script is the object that executes the script. In our example, the script will be placed in the OnEnter script node of the trigger. This means that when the script runs - the trigger object will be the executer or caller of the script and the "focus" of the script will be the trigger object. What does this mean? It means that any function that tells an object to do something, either by actions, casting spells or whatever will be applied to the caller of the script. For example, if we used a function to cast a spell - we would be telling the trigger to cast it and not the PC. To get a object other than the caller to do something we must assign that function to the other object. We do this with the function AssignCommand().
Because we want the oEnter to do the jumping, we will need to assign that function to the oEnter object. First lets enter another comment, on line 4 add a comment of "Assign oEnter to jump". On line 5 enter AssignCommand( ); The command (or function) that we assign will go in between the parenthesis, so click in between the ( ) and looking at the help notes for this function we can see that an object to assign the command to is required. In this case we want to command the oEnter object, so enter oEnter. It also requires a command, these 2 parameters are seperated by a comma in fact - all parameters for function are all seperated by a comma. so enter a comma and then click in the script assist filter. We now need to find a command that will jump the Player. In the filter type "jump". You should see a few different functions. Most notably the ActionJumpToObject and the JumpToObject functions. These are basically the same function with one major difference.
The main difference between these two functions is simple. ActionJumpToObject inserts into the objects action queue at the end of the action queue list while the other, JumpToObject inserts itself at the very top, clearing the rest of the queue. So for example if we wanted a NPC to do 2 actions then jump we would need to do this;
Action 1
Action 2
ActionJump....
If we were to do it this way,
Action 1
Action 2
Jump
The NPC would Jump immediately and Action 1&2 would never happen.
Because we want the PC to jump as soon as they enter the trigger, JumpToObject is the function we need. This function also makes it almost impossible for the Player to cancel the jump by clicking someplace or performing some other action first because it inserts at the top of the Action queue.
Double Click JumpToObject in the script assist list and it should insert itself where your cursor last was in the script editor, which should be after the comma inside the ( ) of the AssignCommand function. The JumpToObject function requires a object type parameter specifying the target object. The Object we want the player to jump to is defined in oWP, enter oWP as the parameter of the Jump function.
You should now have this;
void main()
{
// Declare Variables
object oEnter = GetEnteringObject();
object oWP = GetObjectByTag("WP_INSIDE_CHEST");
//AssignCommand oEnter to Jump
AssignCommand(oEnter,JumpToObject(oWP));
}
Click "compile" (or "Save" if your using NWN1). Now lets rename the script to something comprehensive. Because NWN2 doesn't have a "Save As" like nwn1 we need to open the script list, right click on our cryptic "Script 1" name and select "rename". Using my naming convention listed in the Tips & Tricks Section, name the script "t_ent_chestgrabber". Now go to the "outside_chest" area and select the trigger you painted down around the small chest. In the Properties of the trigger, scroll down to the Scripts section and add your script to the "OnEnter" script node.
Ok, your all done, make sure you have baked all areas and that the start location is in the "outside_chest" area. Save and click "File" and select "Run Mod". When you approach the chest, you should be transported to the inside of your chest.
Congratulations! You just wrote your first working script!
Save this tutorial module as we will be building on it in the up coming sections. If for some reason you just can't get it to work, give me a shout and I will email you the tutorial module. I would rather not place it here on the site for Download because most will simply download the tutorial mod. I feel you learn more by doing rather than downloading.